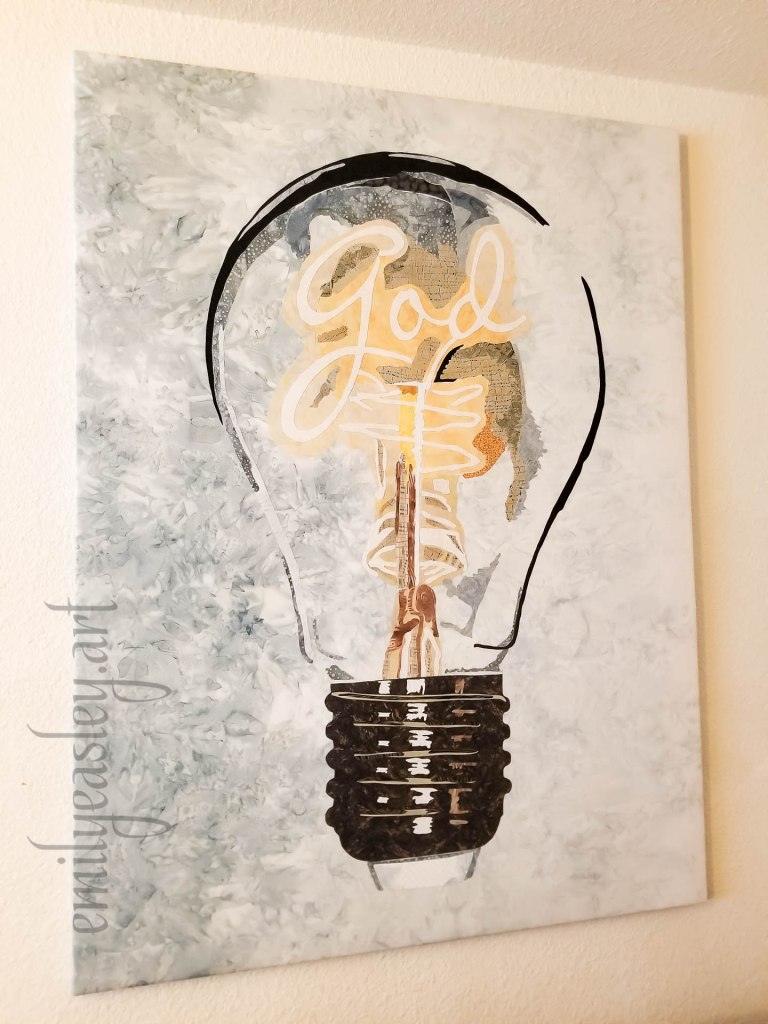
Back in March 2020, literally a week before the nation shut down due to COVID19, I did one more Worship night with my home church Bridgeway Christian Church. We were working through a series called “The Year of Connecting with God” and in that time frame of lessons, we were focused on Connecting with God. I wanted to illustrate something powerful, something visually tangible. And so, the results are below.
We’re studying the Book of Habakkuk of the Old Testament in my church and when I read the upcoming themes/versus scheduled on the calendar for our group of painters to participate and illustrate, I paused, held my breath and there it was, on the page, “Creator Confusion” and I was pinged. I knew that I was being called upon my talents once again. An image had been pulling at me, in my mind for quite awhile, but it just never seemed to fit, timing was off, it just wasn’t the right image for whatever theme we were embarking on, so I shoved it to the “back burner” and waited… but then, as I read, I knew why and I acted on it.
Habakkuk 2:18-20. The prophet, angry, confused regarding the disarray of the corrupt world around him. He rages at God, but God knows what was going on. He always does. He is the ultimate creator, he has all authority over the world. We are reminded that we are to serve God. He has the world in his hands.
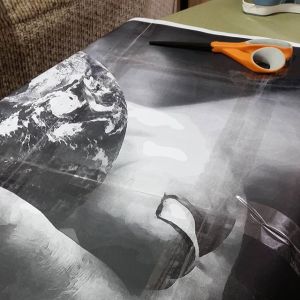
The beginning of the process in making this piece started like all the others. I started with a photo, I edited it in software, and I made a full-size pattern. I then printed a black and white reverse image and began tracing and cutting puzzle pieces out of it, fusing them to a fabric.
Slowly, I pinned the pieces on a canvas as the image came together and the process took about a month to complete. If you get a chance to look at this piece in person at Bridgeway Christian Church, look closely at the hands in this piece, and you will see hidden words. (In the white portions.)
Progression Photos during the design phase.
Phase 1
Phase 2
Phase 3
Phase 4
Final Draft. The white dots you see are the pins that will get removed as I iron it in place.
Detail of how I mark the piece for reassembling in front of live audience.
Progression Photos during services and detail.
Saturday 4pm
Saturday 6pm
Sunday 9am
Sunday 11am
Detail photos once fused and finished.
“The Maker”, May 2018. This piece utilizes 160 hand cut pieces in a variety of cotton batiks and artist hand-dyed fabrics; raw edge fusible applique stretched on canvas. Took approximately 4 weeks to complete. 48″ x 36″.
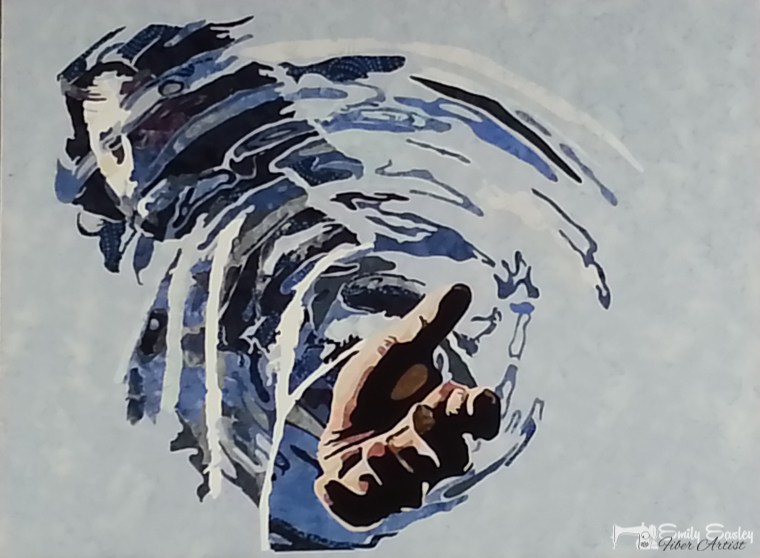
Several months ago my church, Bridgeway Christian Church, was working their way through the book of Judges, and as I sat listening and studying Deborah from this book, I couldn’t get the image of a woman dancing and an urgency to portray The Song of Deborah (Read Judges 5). However, at the time, I was focused on another project for another sermon, so I put the image aside because it just didn’t fit with the timing.
Now, fast forward to about two months ago, the artist ministry group for which I belong to, passed out an updated schedule of Live Painting opportunities and I choose one in the rotation. (Live Painting is a phrase we’ve coined, and it just means that an artist- usually a painter- is painting on stage during worship and sermon before a live audience. I “paint” with fabric.) As the time approached, the theme of the sermon shifted to worship, and it struck me that this was where “my dancer” would come to fruition. Our Pastor focused on a phenomenal lesson on the different ways we worship, how important worship is and how we all connect to God in a variety of ways.
It was an incredible weekend. I had so many people come and speak to me regarding my dancer and how it spoke to them and amazing emotional connections. There was even a moment while I was on stage, pinning away, I got teary eyed because I could feel the percussion climb up through my feet into my chest from the music and I could sense the movement of dancers behind me. Words can not portray adequately how this moment was pure and heartfelt throughout the room.
And you might be asking, what does painting have to do with worship? For me, it’s an outward visual expression. Most of the artists in my group would pretty much agree that we see ourselves as a visual tool and often try to represent or visually respond to Scripture. When I read the bible, I often see pictures, colors, images flash across my brain. What better way to depict worship than a free spirited woman dancing in praise? She’s in motion with God. Her dress is light with encouraging words from Ecclesiastes 3 wrapped around her. Her hand stretched outward to the heavens. That is the rhythm of God.
“Rhythm with God”, September 2017, Raw edge fusible applique stretched on canvas, 48″ x 36″
When I create art, I don’t look to explain the art or image. I leave that to you the viewer. But I ask you if your heart is heavy if you feel as though your drifting underwater (even if it’s just for a day) look up “Oh, ye of little faith.” (Matthew 14:31) There in the murkiness of life is Jesus above you with his outstretched hand, but it’s up to you to grasp hold.
Commercial cotton batiks and hand-dyed fabrics; fused raw edge appliqué on canvas.
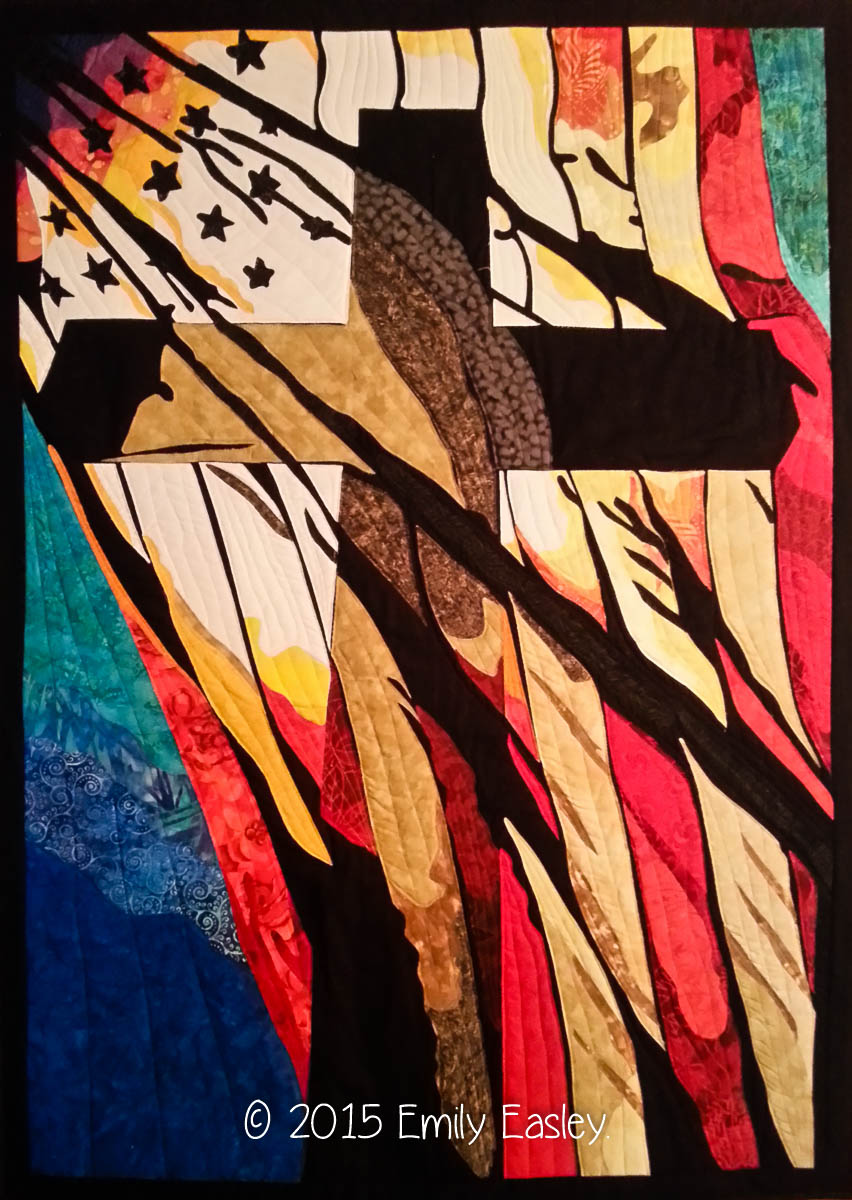
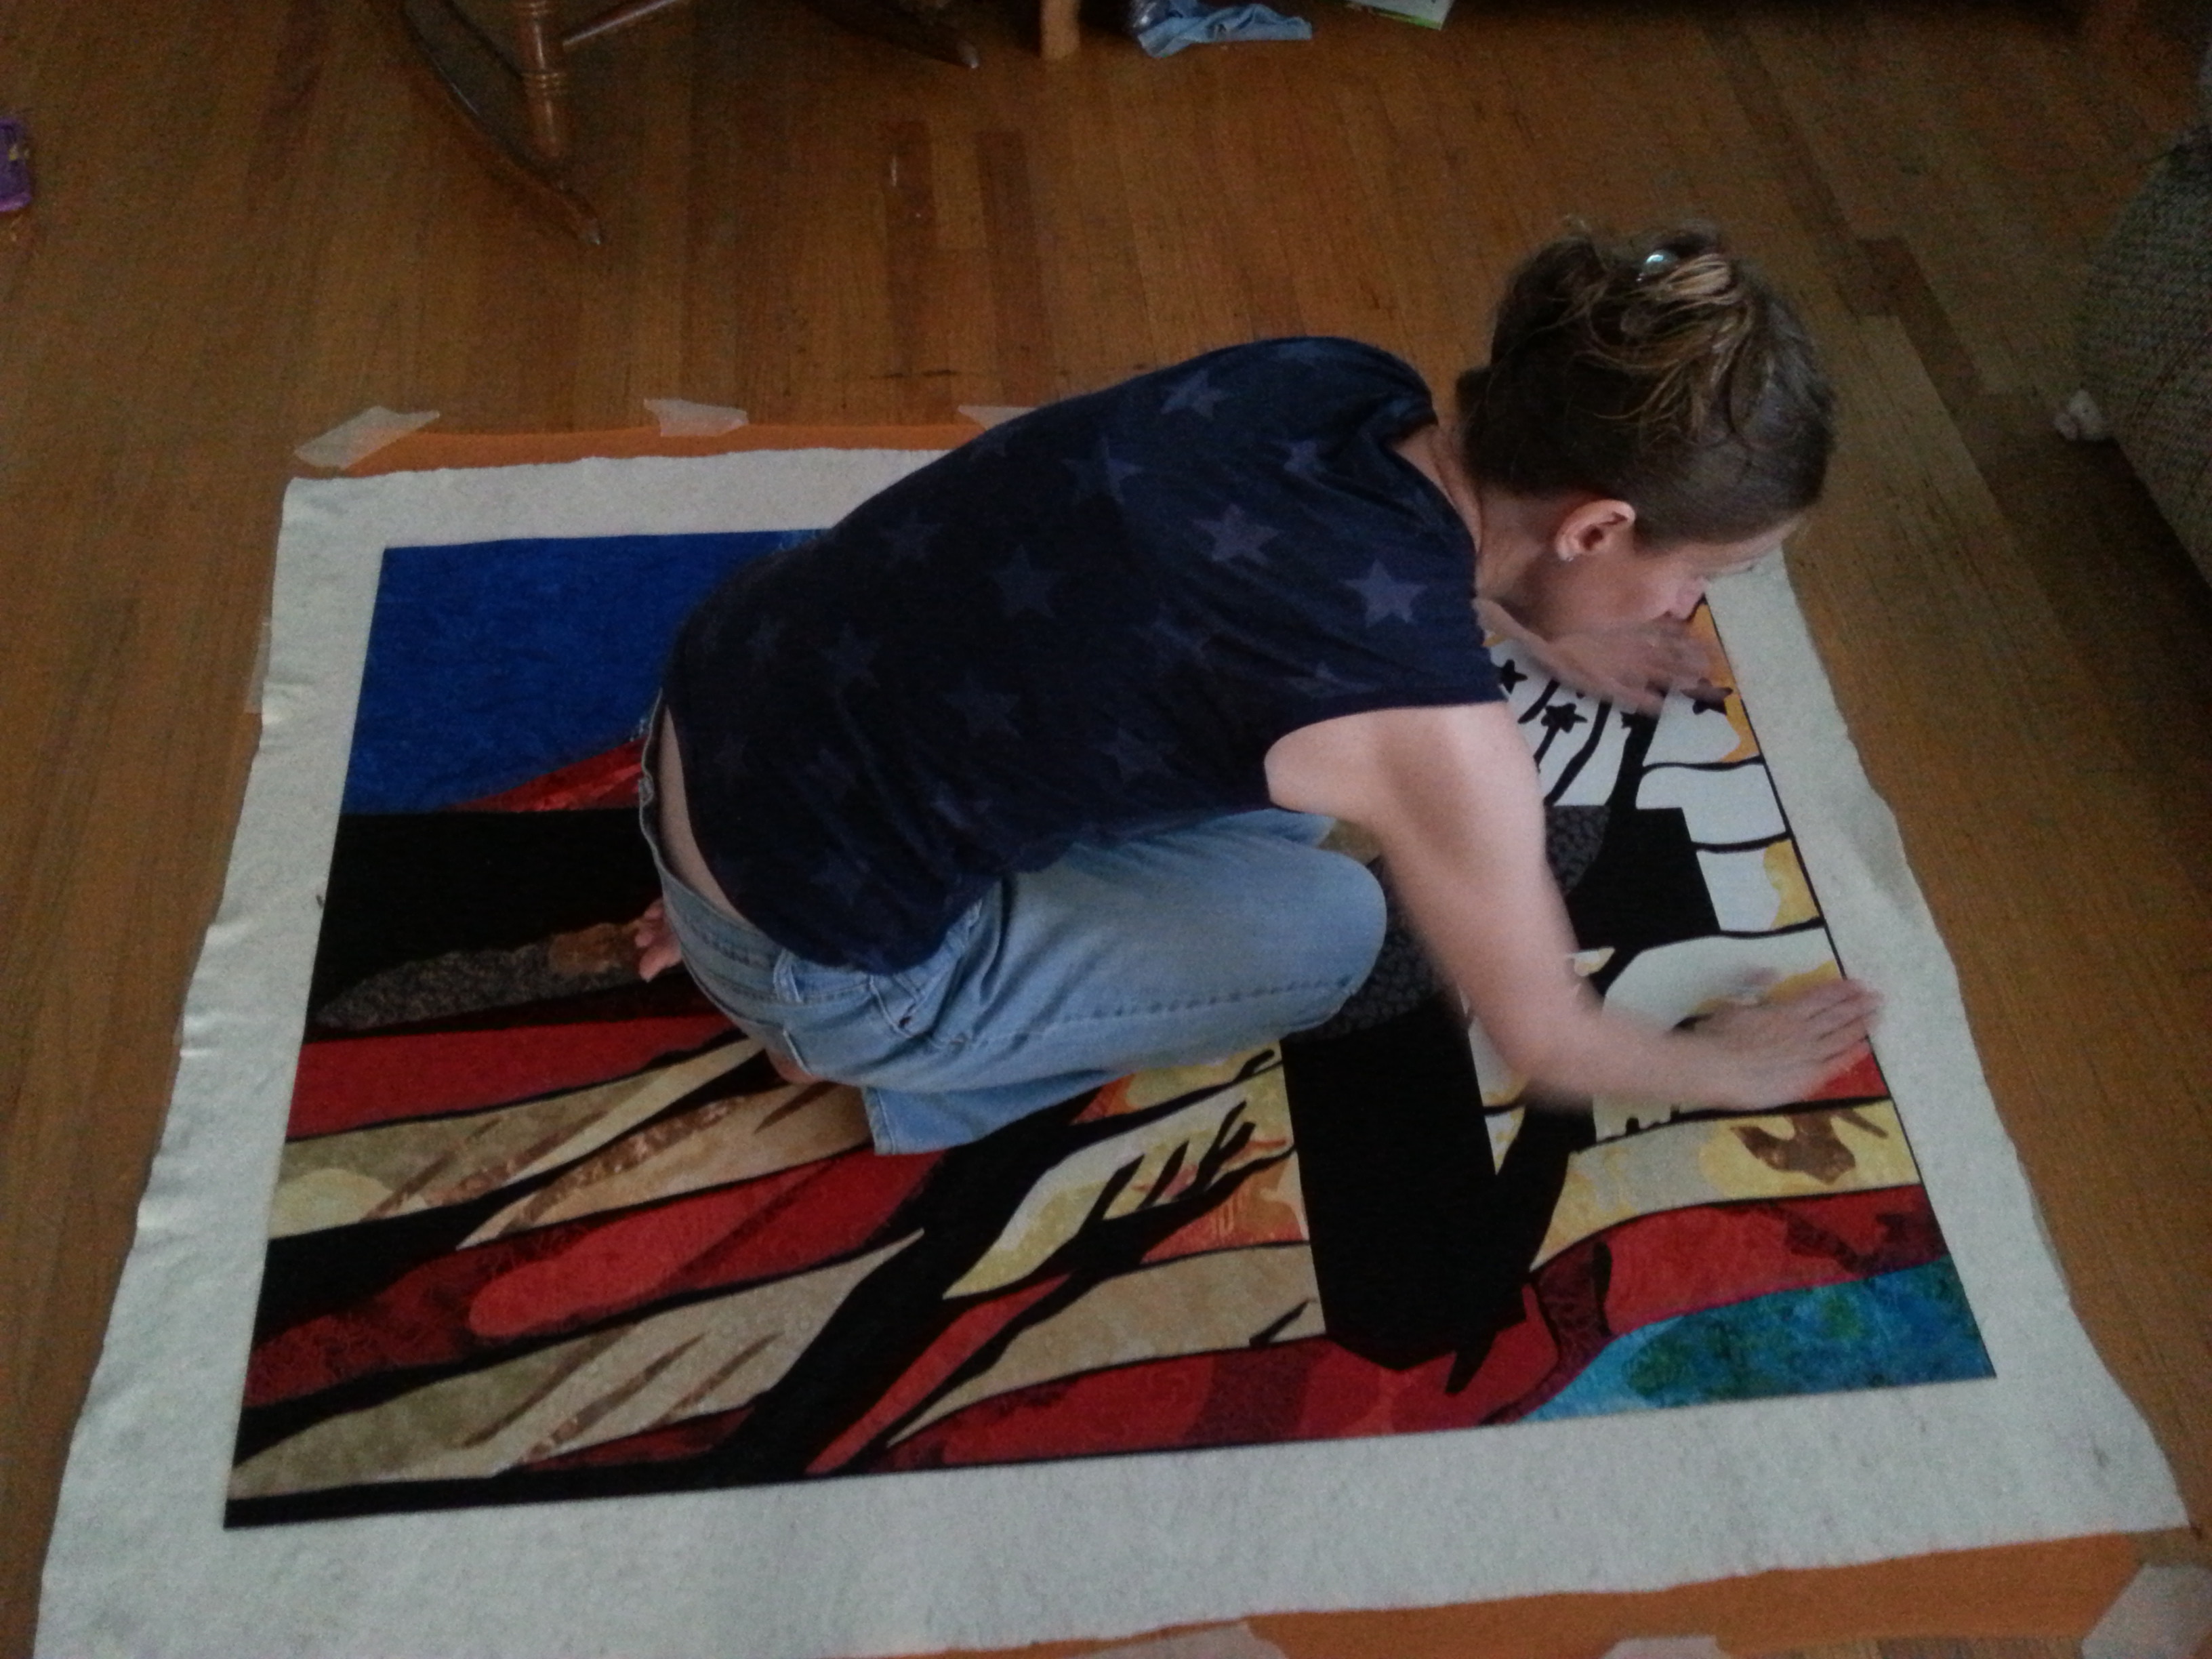
God and Country started out the same as any other piece, except that I had no idea what I was to do. I signed up for a Live Painting session for May back in March, so naturally, I assumed I had all this time on my hands, right? Well, that time soon was consumed and before I knew it, it was two weeks before I needed to have something!
I had too many ideas; I was flooded with excitement, ideas, and visuals. I couldn’t keep focused on one topic, one vision. I really was stuck. Eventually, it struck me smack in the face, gut and heart. I saw an image that stood out. It was simple; it was perfect. An American flag waving in front of a cross with the sun shining brightly through.
Sometimes, we have to sit on our heels a bit and let the confusion disperse. Sometimes, we have to breathe and just trust that God will take the wheel. And when he does, I just turn my face up and say “Alright.” Sometimes, the hardest part is trusting that it will all come together.
I played with the image in Photoshop until it’s suitable for fabric. I call it “cartooning” because basically that’s what I do. I flattening colors,shades and hues, define shapes and lines. And when I’m done, I flip the image so it’s in reverse, like in a mirror, and either print or trace my pattern. And from there, the magic happens.
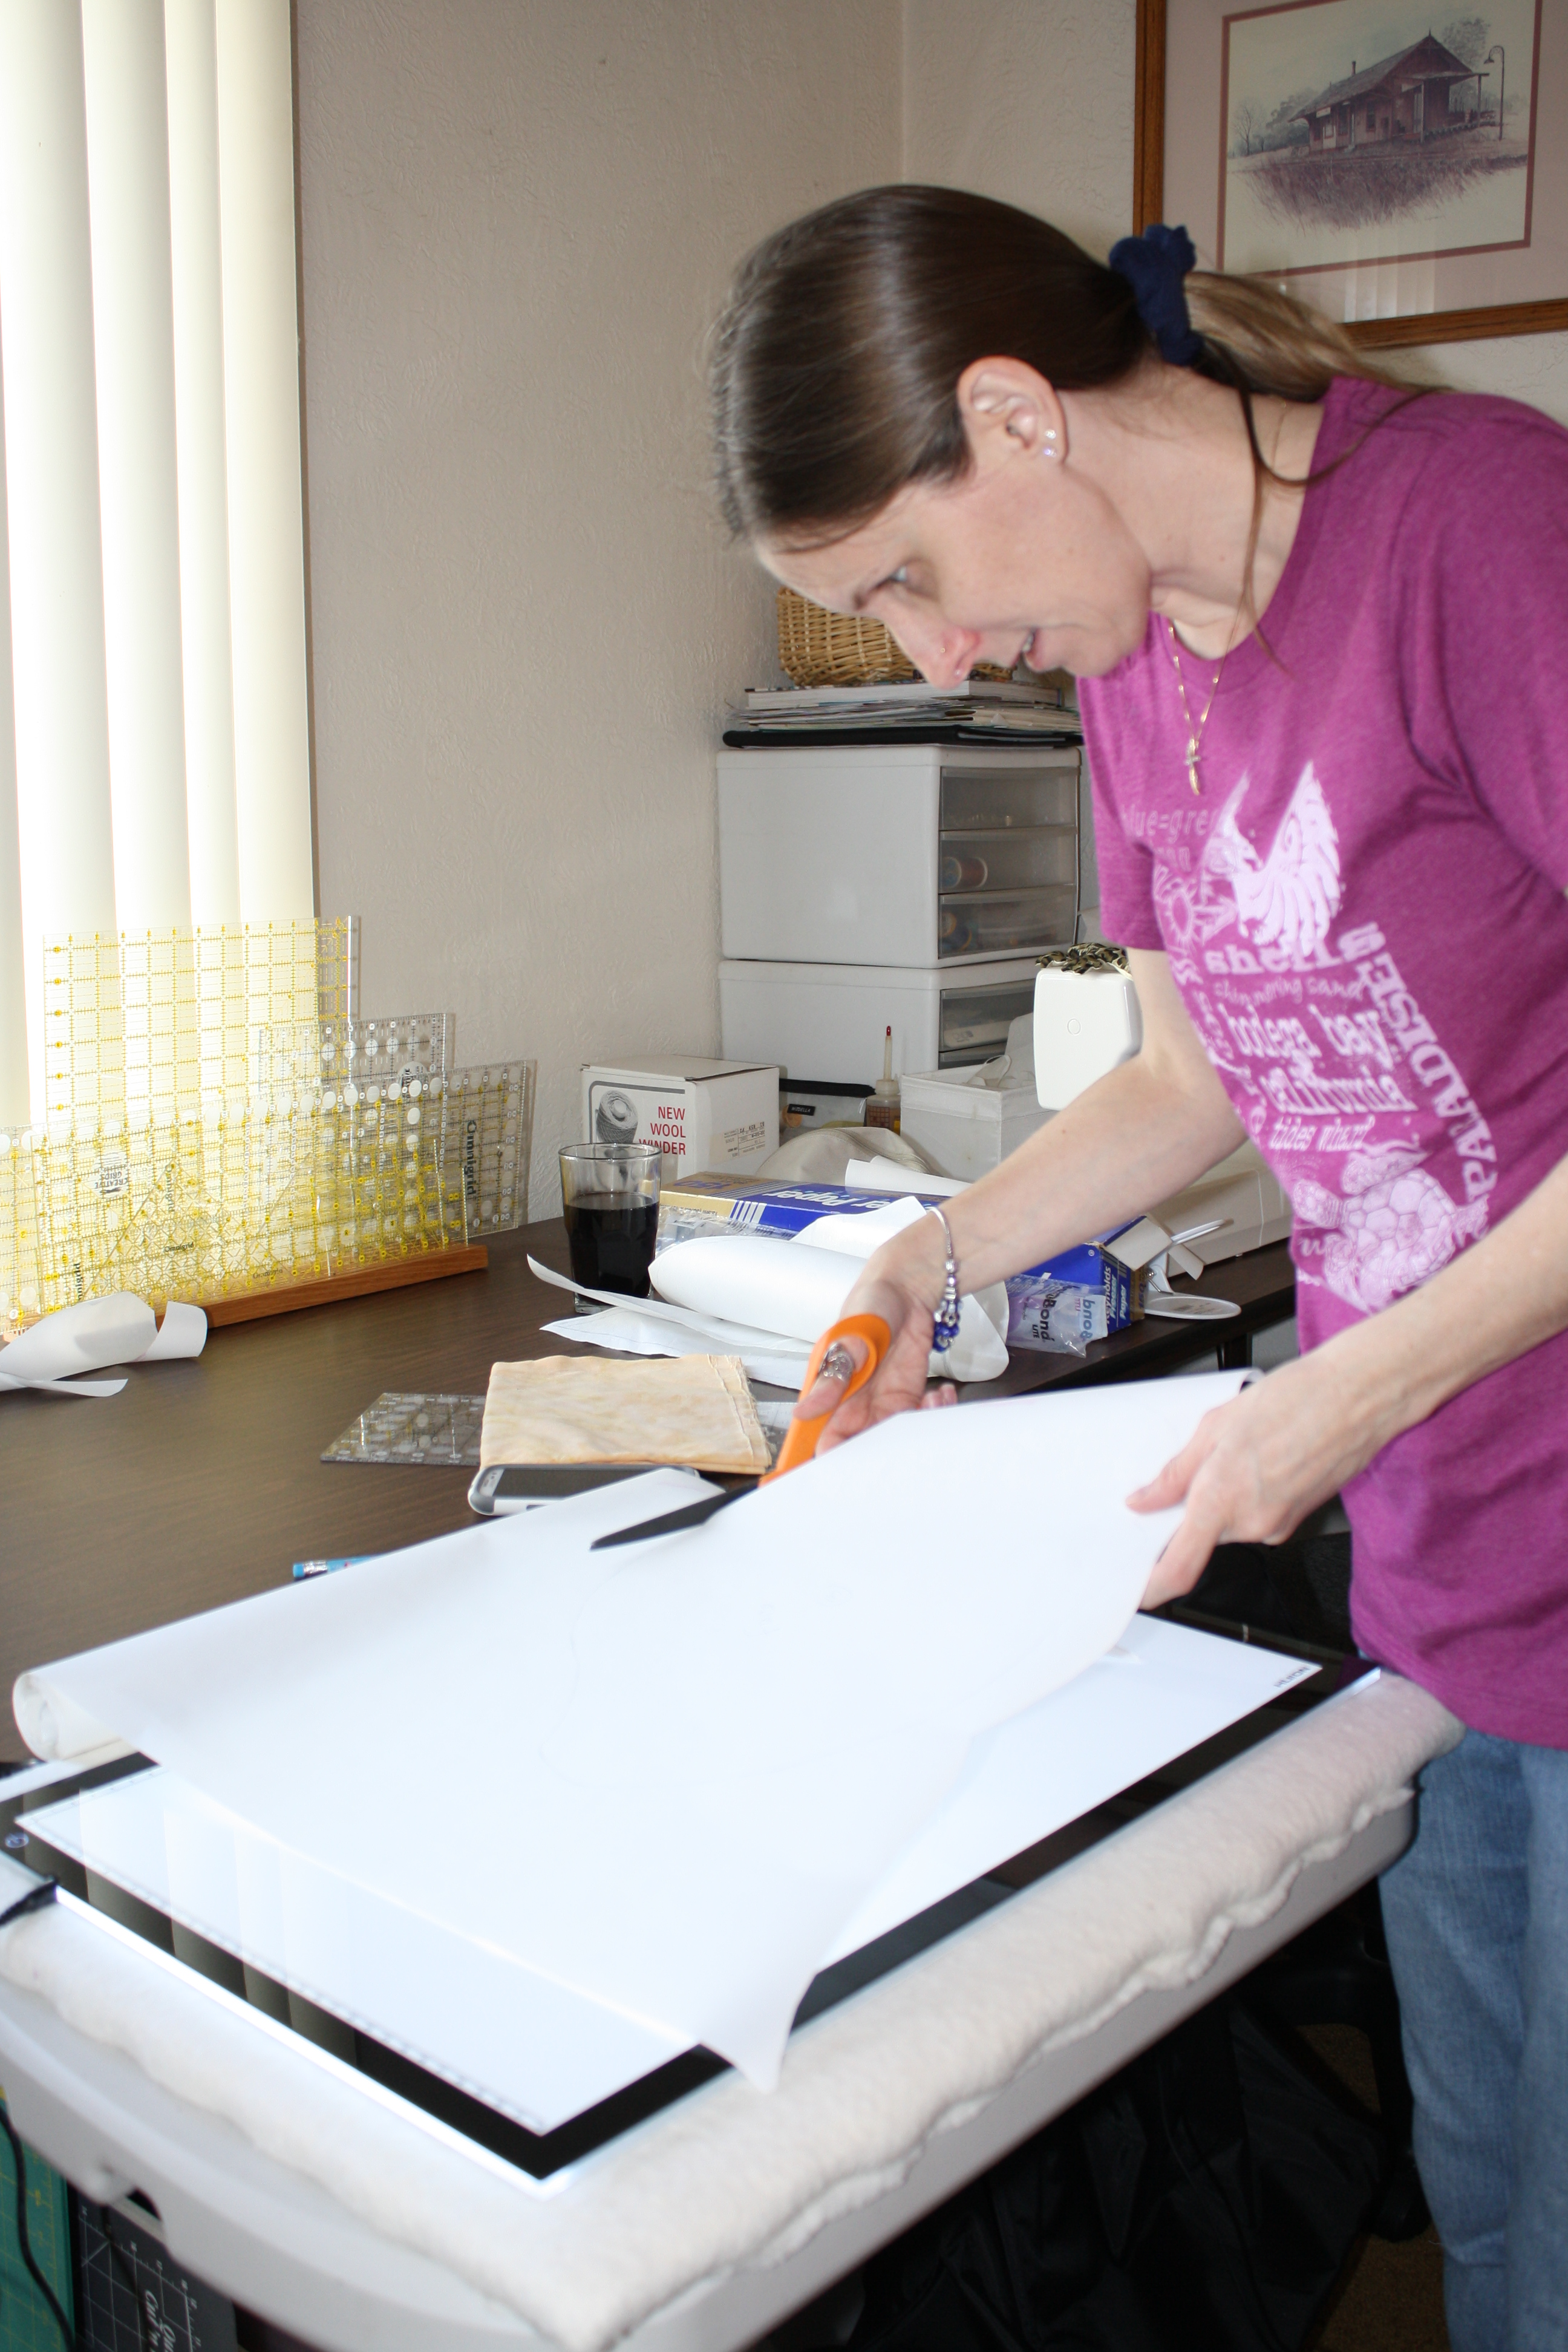
Once I have a pattern to work from, I use fusible web to trace a piece and iron on fabric. I then begin pinning everything to my background.
Freezer paper template
For my cross in the center, I used freezer paper as a template to work my fabric puzzle pieces around. Freezer paper has a slight waxy coating on one side that is great for ironing on fabric as templates for applique and it does not leave any residue.
Once I’m done, I then have to iron on smaller pieces of fabric to larger pieces, and dissemble it if I’m presenting during a live audience. Otherwise, I’ll just continue to iron everything done.
Basting the quilt
After the top is pressed and ironed, I make my standard “quilt sandwich” and begin sewing/quilting.
This piece utilizes a variety of cottons, batiks and artist hand-dyed fabrics; raw edge machine appliqued and machine quilted. .
[Best_Wordpress_Gallery id=”8″ gal_title=”God and Country”]
So how did I do it you might be wondering. This post will recap that process.
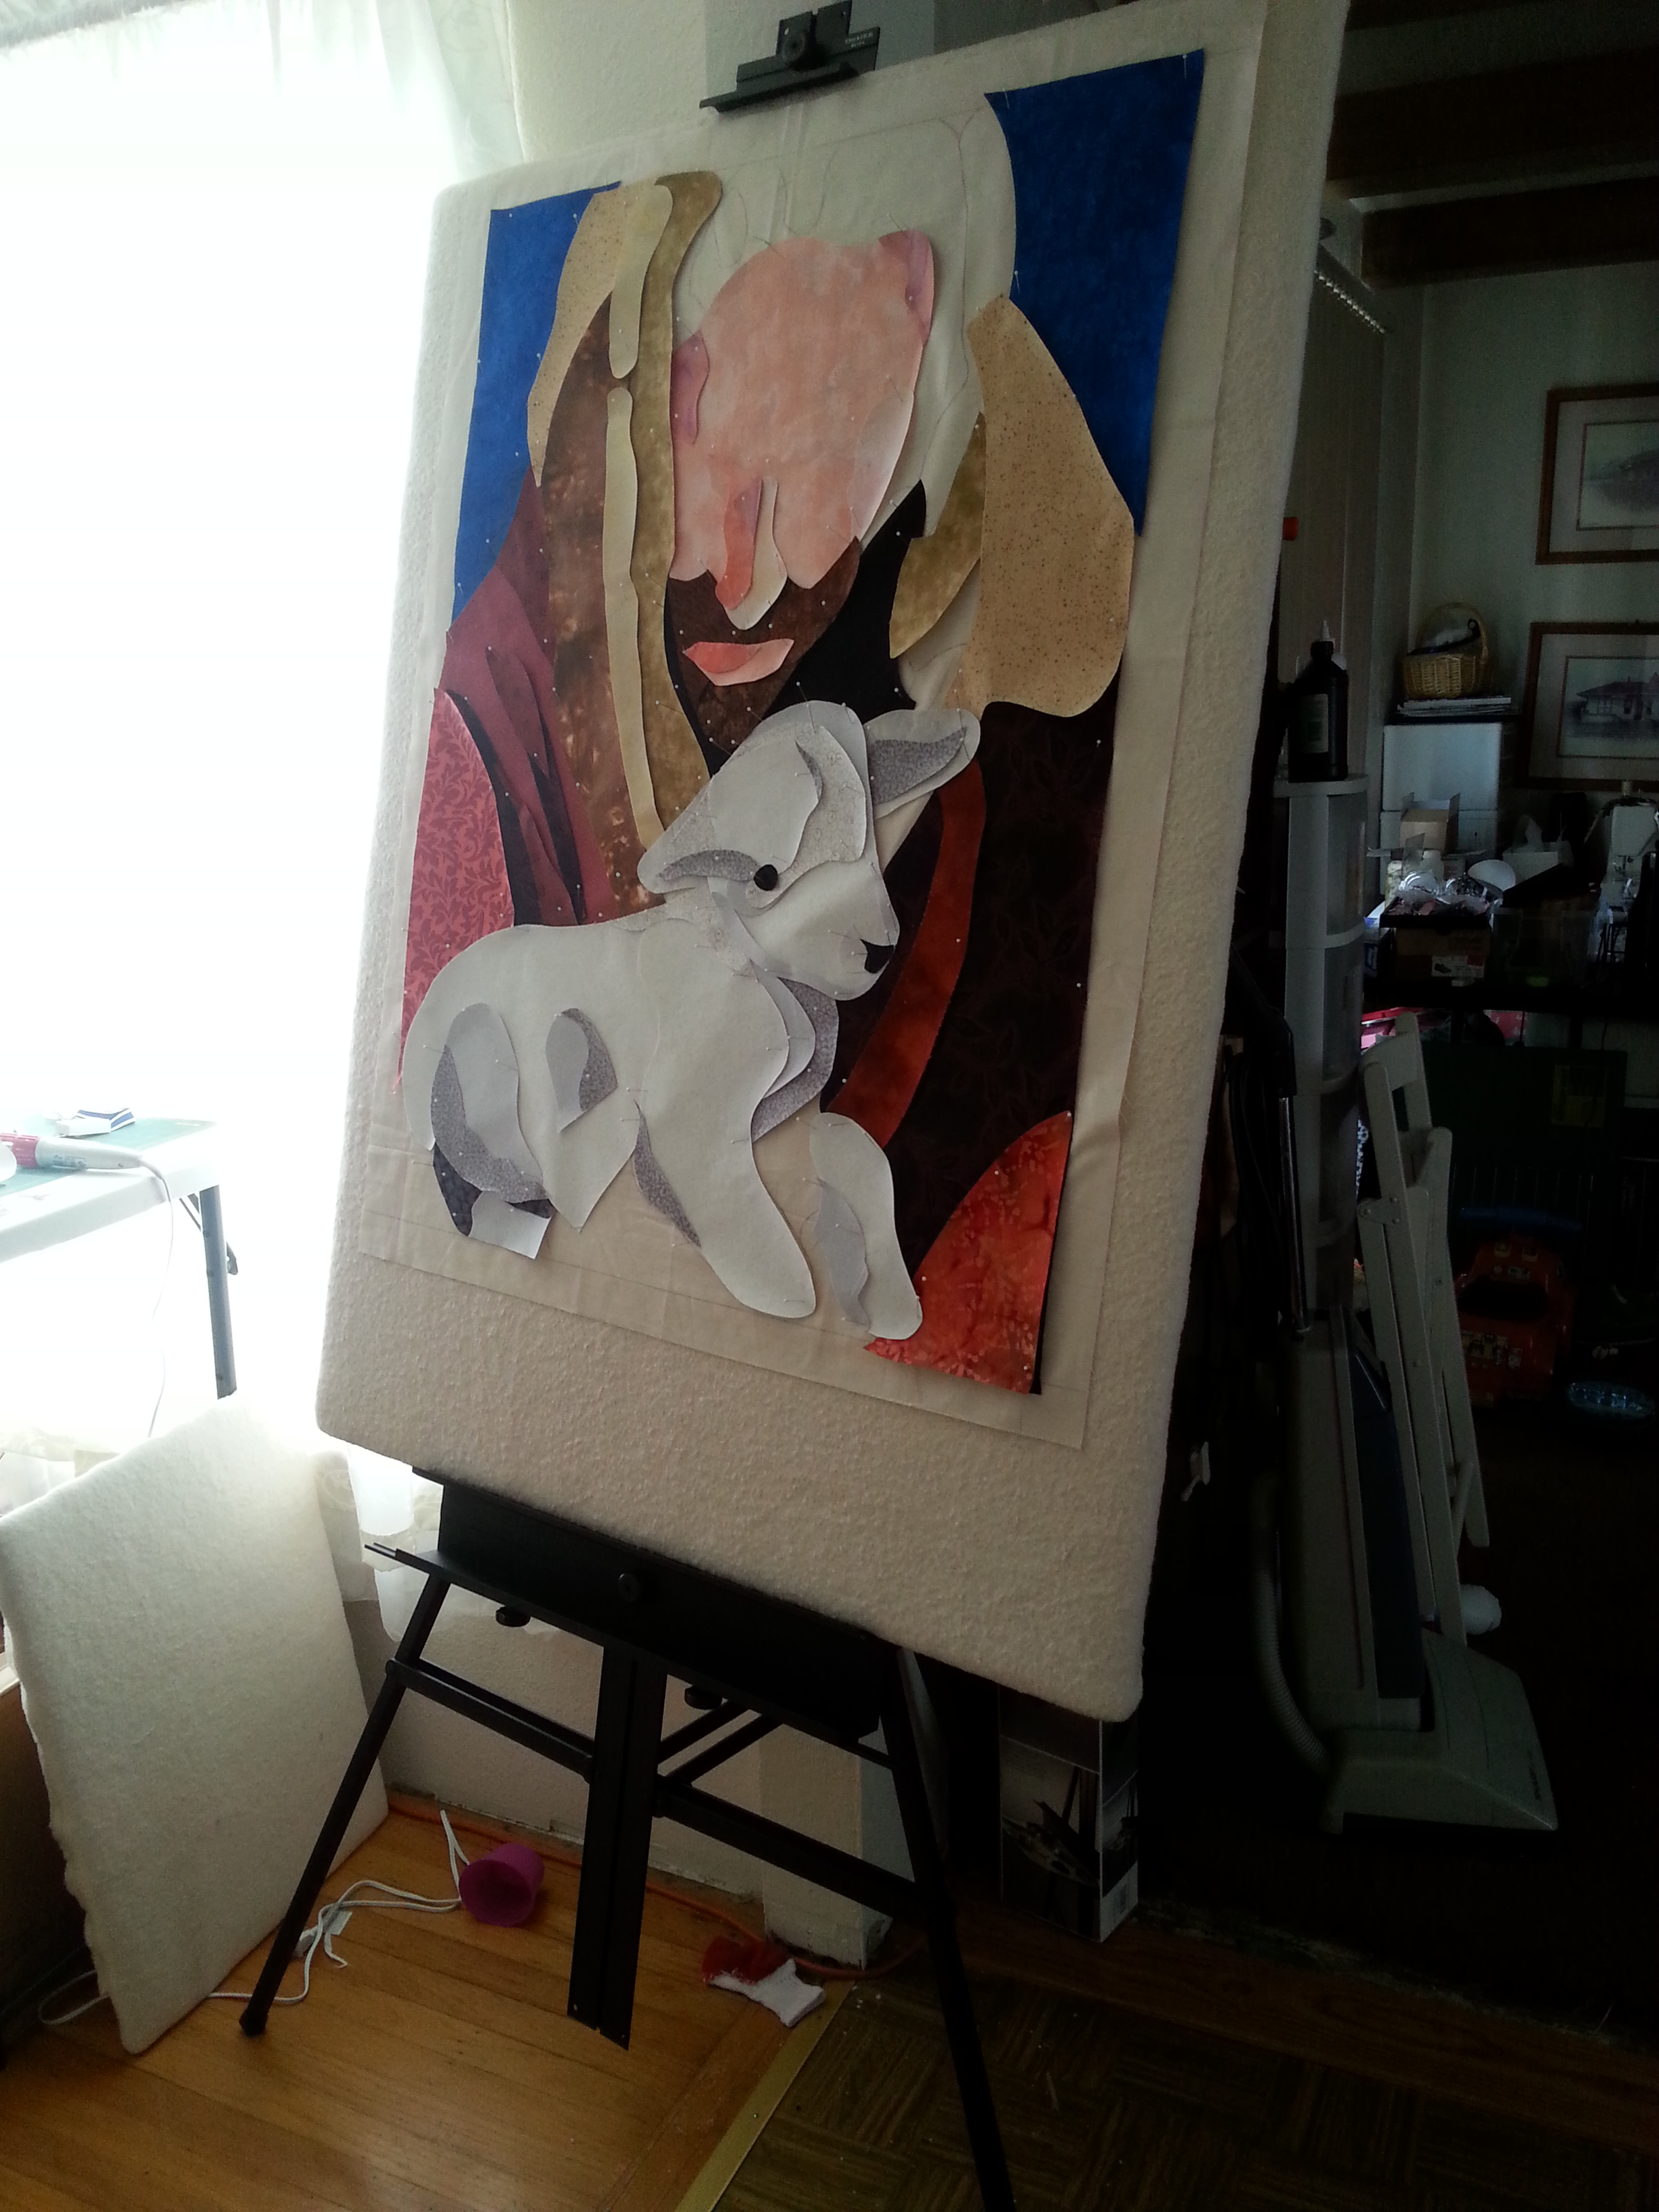
The Lost Lamb
This piece was definitely a learning curve for me because my main purpose was to be able to create something in front of a live audience. Now, I have been quilting for quite a number of years, created a lot of different tops that are sitting in a drawer, but I’ve never created anything “live” before. So, I had to think “out of my box”.
I created a small portable design board out of a piece of press wood and wrapped it with several layers of batting. The idea was to make a sturdy flat surface that I could press a hot iron on and it’s perfect! It also fits on a large canvas easel. This new setup allows for mobility and it doesn’t take up a whole wall in my house! Bonus!
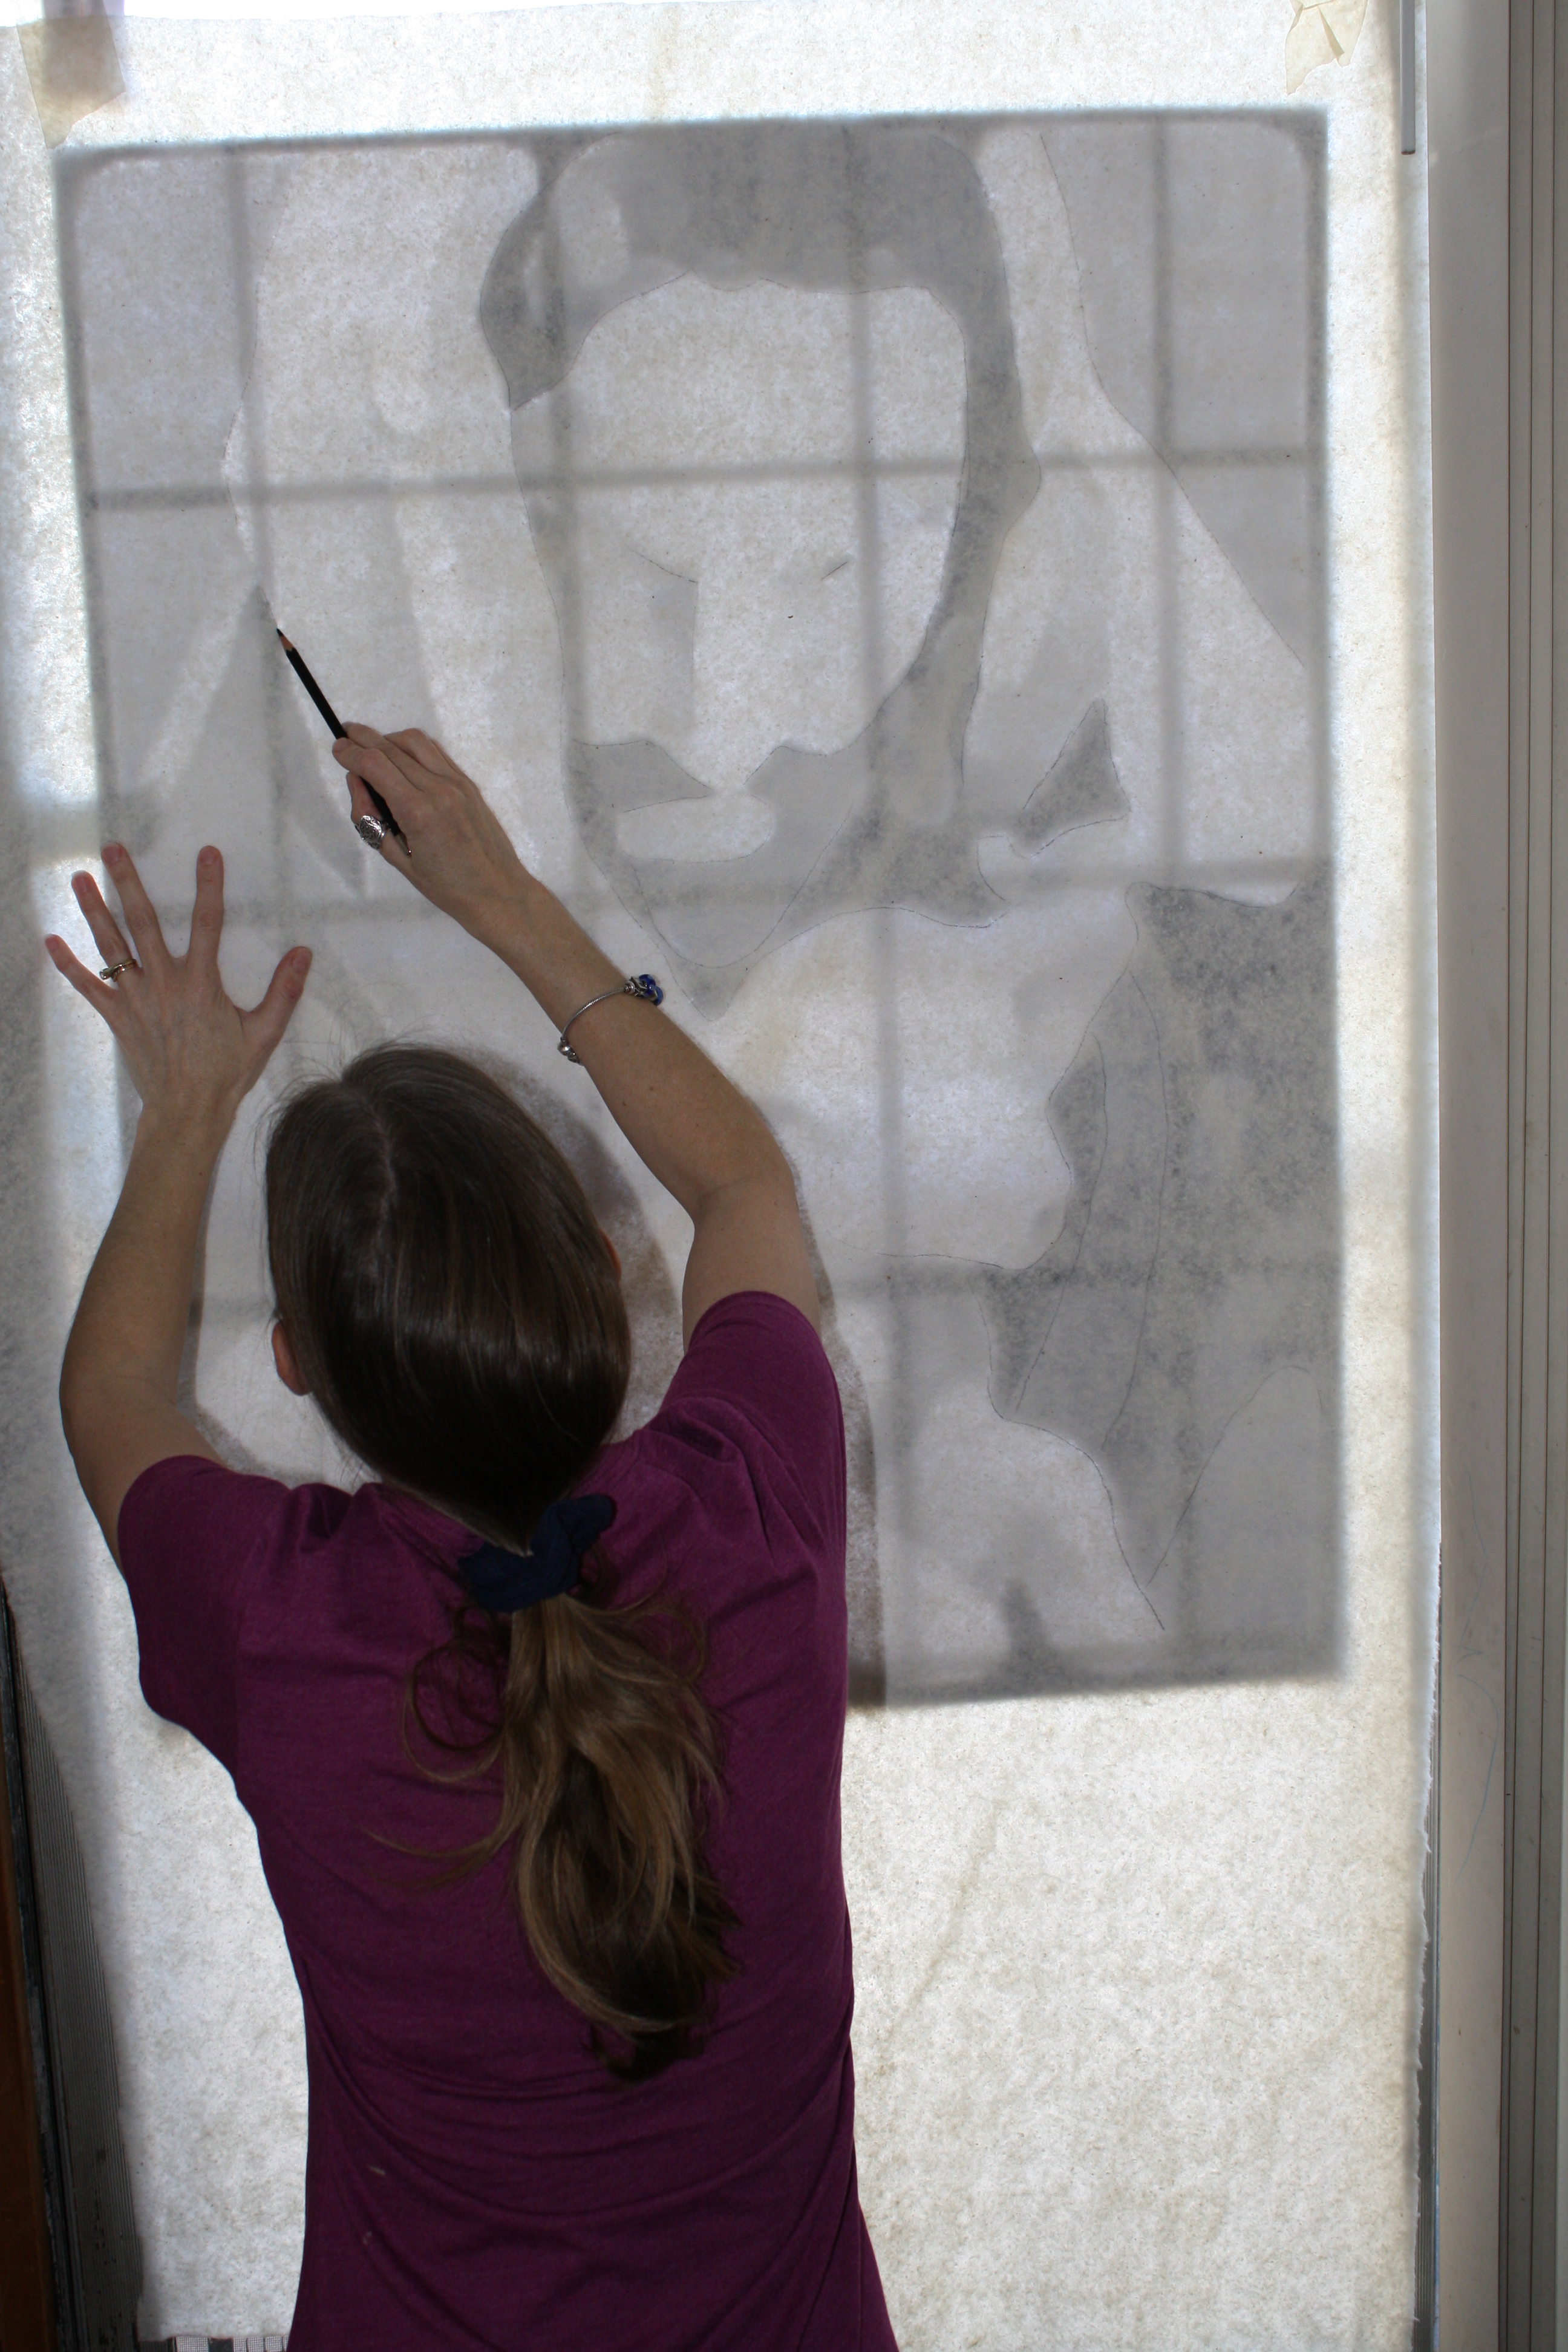
The next thing that I did was prep and print any reference material as any other artist would. I often like to find royalty free or public domain images or stain glass patterns that I can compile together and modify them in a photo graphic editor like Adobe Photoshop. I manipulate the images with different filters until I find a comfortable “template” I can work fabric with. (Filters like Paint Dubs, Mosaic or even Cartoon work best.) It’s not going to be perfect but it gives me a perception of depth, tone and shapes- the areas that pop out at you. Once I figure that out, I print a large poster size and tape it to a window. I trace pieces from this template.
In this piece, I used a single layer of muslin for my background that allowed all my pieces to adhere to because I was making this portable. Normally, I would only fuse onto any background fabric at the edges. I began with all the corners and I slowly worked my way around the piece adding pieces like a puzzle. I used a fusible web interface, in this case, Heat and Bond Lite, which is a sewable heat activated adhesive that provides a smooth edge-to-edge application for appliqués. It has a paper backing that I traced a reversed image of whatever piece I’m working. So, basically, I worked in a reverse image of the finished project.
This piece took about a month to complete simply because I worked sporadically, just a couple hours at a time; but all in all, it probably took about two weeks total.
Below are some time lapse photos as I worked the piece and some close up images of the quilted work. I hope you enjoy it as much as I loved creating it.
[Best_Wordpress_Gallery id=”7″ gal_title=”The Lost Lamb”]
“The Lost Lamb” Sermon: March 22, 2015 Matt. 18: 10-14, Luke 15:1-32, 19:1-10 By Emily Easley 32½” x 41¼”
This piece utilizes a variety of cottons, batiks and artist hand-dyed fabrics; free edge machine appliqued and machine quilted.
The process of this piece is a layered free edge fusible applique technique. I began with a single layer of muslin, layering background pieces then working to top layers. Once all the pieces are put together, like a puzzle, I iron them done, sew them in place and use a standard quilting technique to finish the piece.